
If you’ve never picked up a mooring buoy, also called a mooring ball, it can be a bit daunting the first time; especially if you many onlookers. Read these 9 steps to picking up a mooring buoy so that you understand the procedure and then consider the 14 tips below to avoid making common mistakes.

9 Steps to Picking up a Mooring Buoy
1. After locating a mooring field, or bay filled with mooring buoys, determine if the buoys are private or for public use. Also determine if there are any weight or length restrictions – often buoys are color-coded (white might be private but yellow could be public), provide restrictions and/or have phone numbers written on them. Information prior to arrival can often be obtained from pilot books, plotters, maps, cruiser guides and cruiser websites.
2. Before entering a mooring field, take note of any empty mooring buoys and pay attention to how other boats are lying at their buoys. If there are no other boats to visually inspect, make a note of wind direction and the flow of the current. You’ll want to aim into the wind or the current when picking up a mooring buoy.
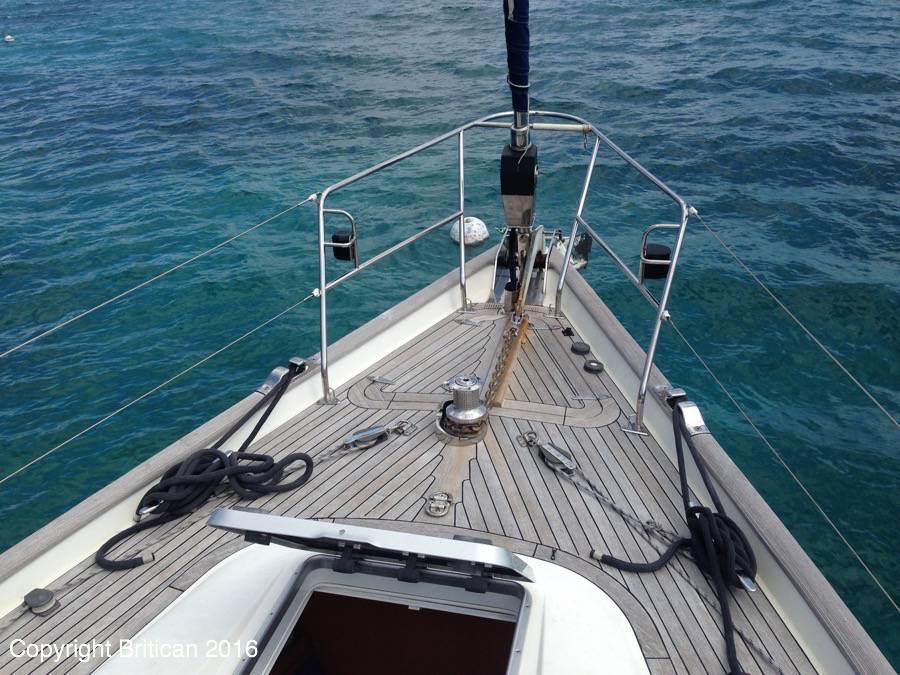
3. Position a crewmember at the front of the boat, preferably with an extendable hook. Also ask them to attach a line each to the bow’s port-side and starboard-side cleats reminding them to make sure the line goes from the cleat away from the boat and then back over the guardrail (in preparation).
4. Approach a free mooring buoy in the direction that surrounding boats are laying. If there are no other boats, head into the wind or current (whichever is stronger).
5. Ask the forward crewmember to count down the distance between the bow of the boat and the mooring buoy while using verbal clues or hand signals to indicate the boats direction. (Remind the crewmember to aim his or her voice towards the back of the boat so you can hear him or her).
- How to build a website with WordPress and what are the best plugins to use: WordPress Web Design Tutorials: How to build a website with WordPress and what are the best plugins to use. Building a website with WordPress is an excellent choice due to its versatility, ease of use, and a vast array of plugins that enhance functionality. Here’s a comprehensive guide to building a WordPress website, along with recommendations for the best plugins.
- The Most Important Stages and Plugins for WordPress Website Development: Developing a WordPress website requires careful planning, execution, and optimisation to ensure it is functional, user-friendly, and effective. The process can be broken into key stages, and each stage benefits from specific plugins to enhance functionality and performance. Here’s a detailed guide to the most important stages of WordPress website development and the essential plugins for each stage.
- What are the most powerful Tools for SEO in WordPress?: Powerful SEO Tools for WordPress: Search Engine Optimisation (SEO) is essential for improving your WordPress website’s visibility in search engines. Here are the most powerful tools to optimise your site effectively:
- How to add shipping modules in CubeCart: Step 1: Log in to Your CubeCart Admin Panel: Open your web browser and navigate to your CubeCart admin login page. Enter your username and password to log in.
Step 2: Navigate to the Extensions Section: Once logged in, go to the left-hand menu and click on Manage Extensions. From the dropdown, select Extensions.
Step 3: Find Shipping Modules: In the Extensions section, locate the Shipping tab to view available shipping modules. You can browse through the list or use the search function to find a specific module. - Gathering domain and IP information with Whois and Dig: In the digital age, understanding the intricacies of domain and IP information is essential for anyone navigating the online landscape. This article explores two powerful tools—WHOIS and DIG—that help gather valuable insights about websites and their underlying infrastructure. Whether you’re a cybersecurity professional, a web developer, or simply curious about online resources, you will learn how to effectively utilize these tools, interpret their outputs, and apply this knowledge to real-world scenarios.
- What are the best WordPress Security plugins and how to set them up the best way: Read a comprehensive guide on the best WordPress security plugins and how to set them up to ensure optimal protection for your WordPress site.
- Will a headland provide enough shelter?
- Learn How To Purchase Your Own Domain Name with Fastdot.com: Open your web browser and go to Fastdot.com. Navigate to the Domains section, either from the homepage or from the main navigation bar.
Step 2: Search for Your Desired Domain Name: In the domain search bar, type the domain name you want to purchase. Fastdot supports a wide range of domain extensions (TLDs), such as .com, .net, .org, .com.au, and many others. Click the Search Domain button. The system will check the availability of your desired domain name.
Note that the port line goes through the eye and back to the port side. Vice versa for the starboard side.
6. Shift into neutral when you feel the boat will drift close enough to hook the mooring buoy.
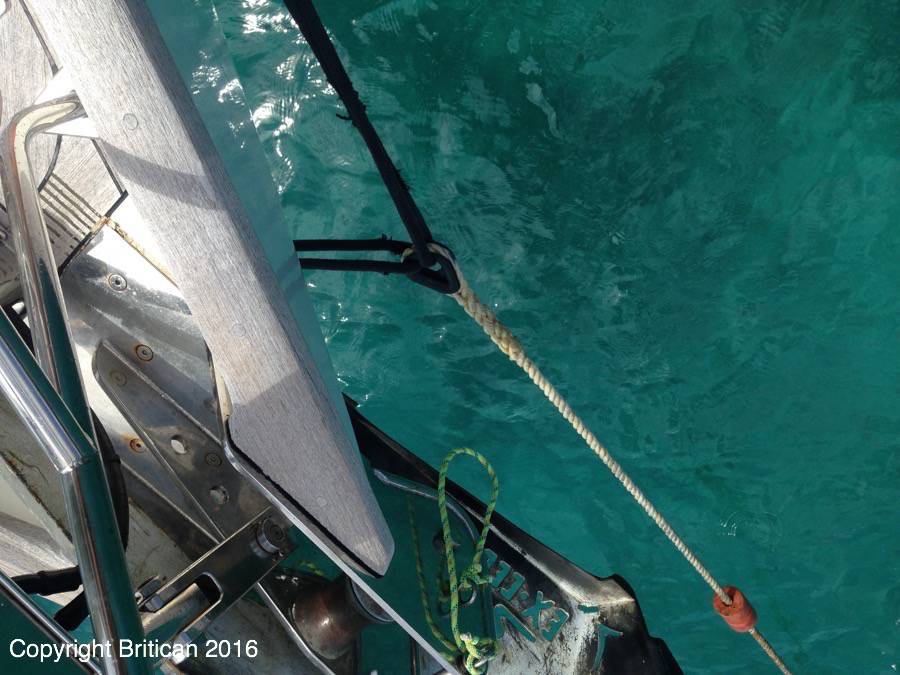
7. The aim is for the forward crewmember to grab the attachment located on or near the buoy (often it’s loop), hoist it up to the bow, slip at least one of the lines through a pennant eye loop and back through to the same cleat. When the weather is calm, there’s often enough time to slip the other line through the eye and bring that back to it’s same side.
8. If only one line is put on, the boat will be held in place however it will be lopsided. The second line can be added by using the engine to create slack, pulling the loop back up and inserting the second line. You can also drive your dingy to the bow to install the second line.
9. Once both lines are attached, the crewmember then needs to make sure the boat is as close to the mooring buoy as possible, so to not encroach on other boats in the field and that each line is equally looped back so the boat doesn’t lay lopsided. If the weather is heavy the use of the engine might be required to create slack so the ropes can be tightened.
10. To leave a mooring buoy, the forward crewmember waits for the helmspersons ‘go-ahead’ and then he or she unties one side, pulls the line in and then the other. Once all lines are in, the crewmember instructs the helmsperson on where the buoy is, so to not run over it, and the helmsperson exits in the safest manner possible.
Note that the port side rope goes down to the loop and back to the same side and vice versa on the starboard side.
14 Tips to Avoid Making Mistakes when Picking up a Mooring Buoy
1. We position a third person midway between the helmsperson and the forward crew to help with communications. We’ve also seen other couples that use hands free head sets to provide instructions to each other. Within the cruising community they’ve been aptly named ‘marriage savers’ and it reduces the shouting that happens without them.
2. Never do you want to use only one line to affix your boat to a mooring buoy due to redundancy purposes. Lines can easily chaff and by having two lines affixed the chances of coming unhooked are drastically reduced. Furthermore, if you use only one line chances are that another boater will visit you and ask for you to add another line – especially if you’re lined up to hit them if you come unattached.
3. If possible, dive on the mooring line and make sure that the integrity of the rope and ‘anchor’ – usually a cement block – look in tact. In many areas of the world, mooring buoys are not serviced or maintained. It’s important to find out what you’re tying your boat to!
4. There is no local or international standard for mooring buoys. One bay will have buoys with long ropes and easy to lift pennants and others will have heavy buoys with only a metal ring at the top! In some cases it’s impossible to pull the buoy up to the deck to tie a line on. When that happens, make a very large loop with one of your lines, throw it around the whole buoy and tie the line back to the boat. Make sure that the wind and/or current keep the line tight and then drop your dingy or jump in the water to physically feed the unused line through the metal hoop. Once one line is secured, remove the other line and properly feed it through the hoop.
5. Note that some mooring buoys have floats near the end, or in the middle, of the line that needs to be picked up. Often these floats are a bit of a distance from the actually mooring buoy. The forward crewmember needs to direct the helmsperson to a position where the floating rope can be picked up.
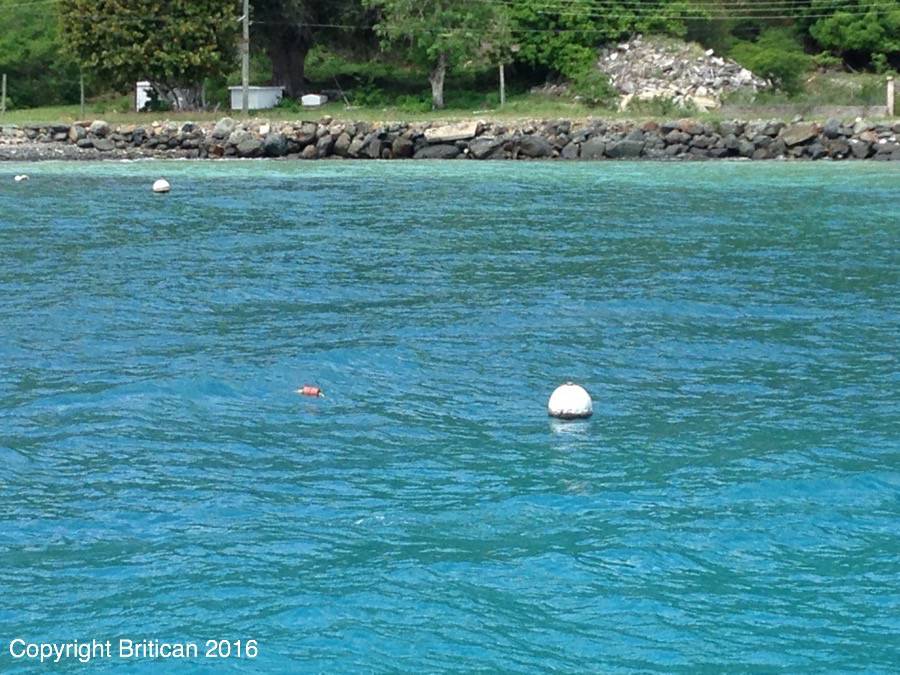
Notice the orange/red float to the left of the mooring ball? That’s holding up the line you need to pick up with your hook. Not ally mooring balls are set up this well!
6. It can be advantageous to back into a mooring buoy instead of going bow first. The same set-up and directions apply however it’s easier for the helmsperson to see and it’s easier for the crewmember to simply grab the buoy line out of the water. Care needs to be taken in relation to any ropes getting caught in the prop and the crewmember needs to be careful not to fall in the water! An added benefit of picking up a mooring buoy from the stern is that the wind will blow through the cabin providing more fresh air down below decks.
7. In calm situations it’s possible for the boat to bump into the mooring buoy causing noise and possible damage to the hull of the boat – especially on colored hulled boats. If this happens you can affix a third line from the bow of your boat through the top of the mooring buoy, run it up through your anchor channel and attach it to your windless winch. When you tighten the line, it will force the mooring buoy to stay clear of the boat.
8. In no-wind situations it’s very common for boats to swing randomly. When this happens there’s a possibility for collision. In other words, its possible for two boats to actually swing into each other – especially if there’s a mono haul next to a catamaran. When this happens, you can either leave the mooring field or sleep in the cockpit keeping one eye open. If boats hit each other it’s often just a little kiss but one time our bow hooked up with the bow of a catamaran and locked together! It took us a while to break the bond (the two boats were in love!).
9. When leaving a mooring buoy, there’s often a situation where the forward crewmember cannot get the line untied due to tension. If this is the case, the helmsperson needs to engage the engine and get closer to the mooring buoy.
10. Don’t use bow thrusters if there’s a possibility of a line being in the water when tying onto a mooring buoy.
11. NEVER leave the helm if the forward crewmember is struggling. It’s far easier to let the line go and try again than it is to rush back to the wheel to avoid a collision.
12. If you undershoot the mark, just engage the engine for a few ticks. If you overshoot the mark, just let the boat be pushed back with the wind and or current. If you totally miss the mark, make a big circle and do it again.
13. If help is provided in a mooring field, someone on a boat will come up to the bow. Hand the bulk of the rope (coiled) and the end of the line to the person and they will feed it through the mooring ball attachment giving it back to you to secure back on the same side. When you’re grabbing the first rope back, you can often give the helper the coil and end of the other rope or position it in a place for them to grab it off the deck.
14. Tying onto a mooring buoy can be hard work for new learners. If you ever see someone struggling, make sure to get into your dingy and head over to help them! Always pay it forward as you never know when you’re going to need help.
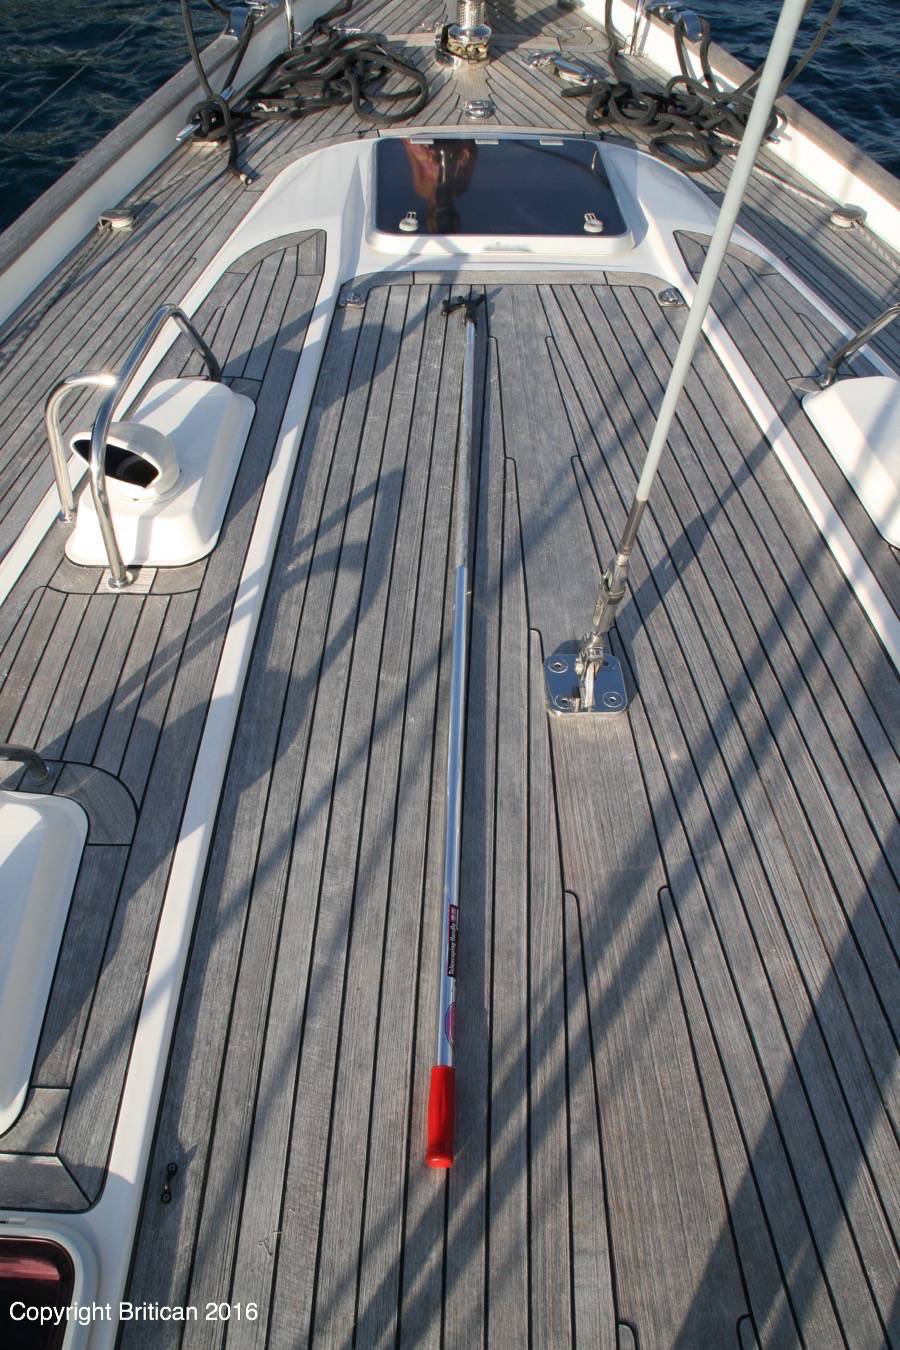
Here’s the pole I use to grab the rope off the top off the mooring buoy.
